23 April 2016

Another announcement+All About Backgrounds!

First of all, wow. I'm glad people find me helpful. Really, I am. Thanks Star for the S/O. Seriously, thanks. As a side note: Hello lovely reader! Welcome!

Well here's your announcement:
I'll be going on vacation to Florida this week; Both to cheer me up and hopefully give me inspiration to work. I've been trying to navigate around my depression to crank out tutorials for people who read the blog, so i'll be able to get tutorials out faster. Another note, I'll be releasing a tutorial every day of this week. Enough of my sob story, huh? Let's get started.

I'll be teaching you some simple tips on backgrounds and borders, and talking about how to incorporate them into a photo as a whole. I'll most likely be doing a part II because this is such a broad topic.

*****QUICK DEFINITIONS FOR YOU*****

Transparent background:
A background with a checkered pattern, indicating that there's nothing there. Clear when you put it on other images. Your editing software's way of putting "nothing" into an image.


Solid background:

A background with one color consistently. Nothing else in the background besides that color.

Noisy background:
A background with a lot in it. E.g things in the background.

**ORGANIZATION IS KEY, SAVE A FOLDER FOR BACKGROUNDS SPECIFICALLY**
My rules for backgrounds/borders:


1. Electric green as a solid color for a background is not good.

It leaves a nasty green border around your woozen if you don't have an experienced hand at outlining.


2. borders should not be the main focus of your image

If the photo is 75% border and 25% woozen it should be called a border edit, not a woozworld edit.

3. simplicity is key.
Don't make an edit with 15 different components. Simple is good. You can have a lot in your image if you do it right, but even I can't do that.

4. Always have a picture of your woozen with a transparent background on hand. Always.

It makes the entire process SO. MUCH. EASIER. you don't have to worry about outlining. Just don't get lazy. a fresh image once in a while won't hurt.

5. Size matters. 
Didn't think i'd ever be saying these words, nevermind writing them. Size matters, and a lot. If you make a small image big you'll make the image blurry and un–usable in terms of background
**TIPS FOR GETTING A PERFECT BORDER/BACKGROUND**

1. Remember to get a good fitting image for your woozen, its better to go bigger than smaller.

To quote #5 in the latter list, SIZE MATTERS.

2. Google has an option where you can search for a specific size of an image. 

EXPLOIT THIS OPTION UNTIL GOOGLE REMOVES IT
. This has saved my life so many times.


3. Google has an option where you can search for a specifically colored image.


*cough, cough* Transparent images *cough*

4. Only use contrasting colors for background when it adds to the atmosphere.

I only know of a few artists who can do this and not make their image look like a rave party. Key word: few. I don't want to discourage anyone from trying it though, you might have some hidden talent.

5. Black>White backgrounds.

Haha. This one is a matter of preferance, but I always prefer black backgrounds because they hide a ton of mistakes. #TeamBlackBackground.
Until tomorrow, stay creative:

~James

22 April 2016

My ~NEW~ Signoff Pic

Hey guys,

It's finally here!
My new signoff pic:


I did this on photoshop, with the help of Jamessoup's tutorials:

Sticker Edit Tutorial
http://www.thewoozworldvoice.blogspot.com/2016/04/sticker-edit-tutorial.html

Have a go yourelf!

The Wooz Voice Central Has Moved!

Hey guys,
Wooz Voice Central has now moved to this unitz:


Let us know what you think!

21 April 2016

Update on outfits in store

Hey guys! Its Amahix here with another post on the latest fashion in woozworld. The woozworld band does a good job coming up with these outfits.These outfits are  for jenny's birthday party.   Here are a few of them that they made:


I hope you like this post. Be sure to be able to stop by the store to get these outfits because there for a limited time only. In my next post i will show you some more outfits and will show you some of them in shopz. Ill see you next time. love you to the moon and back. 


15 April 2016

HANDS+Announcement+Author's note.

Hello, lovely reader. Welcome back to one of my posts. I'm so sorry for not posting often. Please try to understand it takes 3+ days to figure out every technique, come up with a simple one, plan it, make sure there are no typos, get images, and so forth. Well, I'll be talking about two things in this post. One I'll be covering briefly, the other will be in depth. Let's get on with it, shall we?:

The announcement. I'll be releasing video tutorials, even though i'm absolute garbage at video editing. I'm hoping it works out and I think we'll get some good work out there.

Hands. hands and my deep love/hate relationship with them, ugh. I absolutely despise these little intricate line strokes. Well, enough of my opinion. I have three golden rules for hands (or any intricate woozen-parts.)

1. never color anything in if you absolutely don't have to.
I'm not a lazy guy, you know that. But divine being do I LOATHE not having a neat edit but instead having that one strand of hair, that one finger that ruins everything. People focus more on that one mistake. That one out of place line. 
2. less is more.
I cannot stress this enough. I'm still learning new things everyday. If you're not at a certain skill level, don't attempt more. a subtle dot is enough to redirect your focus. imagine an entire symphony of lines and colors. Remember, you're you. Not Jason Pollock.
3. dropper tool, bandage tool. they are your water in the desert. USE THEM.
WOO, divine being, here we go. These babies have saved me from a proverbial beating. use these like air. The dropper tool-for obvious reasons- is a great tool for touch-ups. The bandage tool- better known as the Healing Brush tool- Automatically fixes that particular part of your photo.
Dropper tool, Bandage tool.
Well those are my rules. Feel free to copy them, make your own, even not use rules *gasp*. Here are some tips:

1. Divine being in the sky, never use hand templates. 
IF you're not experienced with using templates, DON'T. Ever. It makes your work look sloppy, unorganized, and unprofessional. Prime example:
:  VS   
Guess which one the template is?
2. If your woozen is holding something realistic, give it a realistic atmosphere. 
If they're holding a pen, make their hand grip. etc.
3. be creative
Don't just a little wink and peace sign.Give me action. Give me heroism, Give me a sense of awe. If anyone reading this can make me an edit that can invoke any of these feelings, message my woozen, show it to me. 

If you have any requests, feel free to contact me. 
~James

12 April 2016

New Outfits In Shopz?!!?

Hola Amigos! Star Here With Another Post About......NEW OUTFITS in Shopz! Lalalala

Anyway Lets Get On With The....Post!


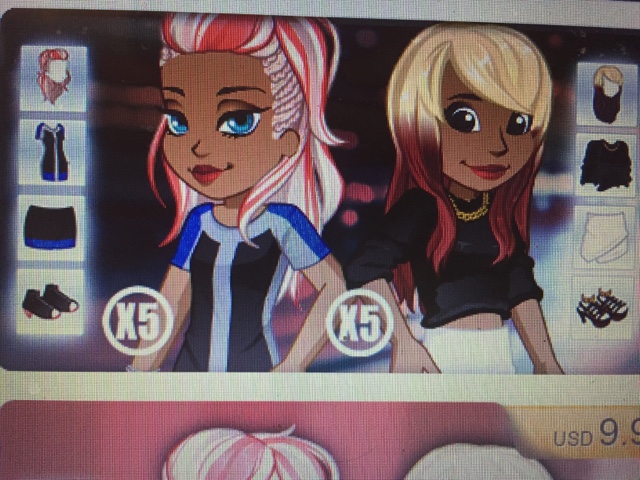
Here Are Some Shots Of The New Outfits


 Awesome Right?


11 April 2016

Sticker edit ~Tutorial~

Oh why hello there. I'm back with an edit on how to make your woozen look like a sticker:
Very common edit, very simple one at that. Let's get right into it. 
Double click your woozen's layer, select "stroke"make sure the outline color is white, and press okay.
Duplicate that layer by right clicking and selecting "duplicate layer"
select the duplicate.
fill it in black.
reduce the opacity.
position it behind your woozen. 
All done! just save the image and do what you want with it. Stay creative my friends.
~James

10 April 2016

New outfits in the store

Hey guys! It's Amahix here with another post. Today I will show you some outfits in the store. Mya always comes up with the best outfits in the store so this week she let the woozens decide what outfits they wanted. Here are some of the ones you guys picked: 


Here are all the outfits and shoes that you guys picked. 

The first outfits are $9.99. 
The second one is $9.99
The third is $2.99 
The last is $1.99 

I hoped you guys liked this post. All see you next time with another post. Ps: you can get these in the store right now. 

Love you guys xoxo- Amahix 

09 April 2016

Double Exposure ~Tutorial~

Heyo. Today i'll be teaching you lovely readers how to do a double exposure photo. What a double exposure is, is two photos overlapped to make one. Much like a double contrast, but slightly different. Here's an example:
Looks SUPER ADVANCED right? Wrong. It's a fairly simple concept that will be simple to explain, with a basic understanding of layers. Here's what you'll need for this lovely project:
I'll explain this to you in simple terms the best i can. 
1. Outline your woozen.
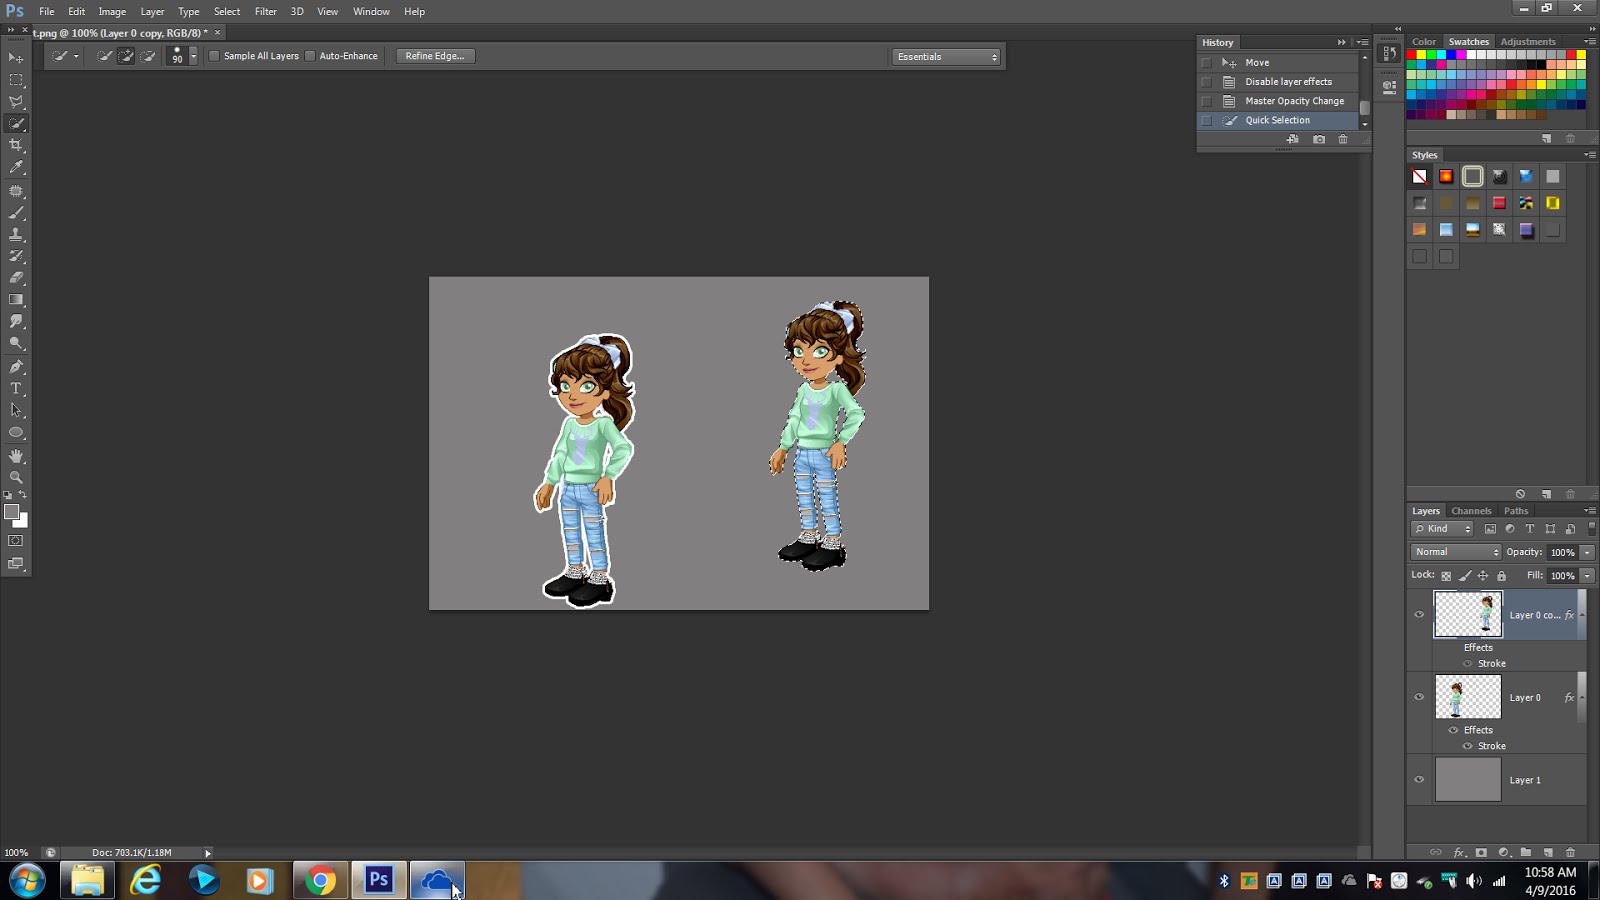
Okay, The first thing you EVER do in an edit is OUTLINE YOUR WOOZEN. Of course, never use the Magic Wand tool, the Quick Selection tool, or the "auto-outline" feature. I have a deep-rooted hatred for these. Since its a robot outlining your woozen, you don't get the desired effect. Instead, Use the magnetic lasso, lasso, or polygonal lasso. A lot of editors on here would tell you otherwise, but trust me it's worth it. After you have your woozen outlined you should see a black and white border around them. This border is called marching ants. 
 
2. Make a new layer with the woozen in it. 
To do this, right click your woozen (Or ctrl+click for Mac users) and select "Layer via cut" This creates a new layer with ONLY your woozen in it, which makes the entire process much easier.
This is what your layers panel should look like:
Select the layer "Background" and delete it.

This is what your image should look like now:

3. Take out the picture you want to overlay on your woozen.

4. Copy and paste the overlay image (forest) onto the image of your woozen. 
You can do this by using the Quick Selection tool on the overlay image. Then on your keyboard press ctrl+c (command+c for mac) Now switch to your woozens picture and press ctrl+v (command+v for mac)
this is what your image should look like.
Click on the layer labelled "Layer One"
5. Select your woozen.
This will be much easier because your woozen has a transparent background. Just "color in" your woozen with the quick selection tool.

6. Right click (ctrl click for mac) and click "select inverse" (DON'T FORGET TO SWITCH TO LAYER 2 AFTER YOU'VE PRESSED SELECT INVERSE)

Run your eraser in the outlined space.
 
Select the forest layer:

REDUCE THE OPACITY TO 55%
Until next time, Stay creative. 
~James

06 April 2016

Editing Using Paint! (Winking)

Heres a edit that you could do using paint! the picture below isnt me, bc im faceless and to do this edit you need someone with cutie-n-makeup, scroll down to see who this pic belongs to! ok, so lets get started! first of all you need to take a pic of your face, then post it on woozin, and im pretty sure you all know how to copy and paste. Then open up paint, paste the picture, then make the picture bigger. under "edit" there is a n rectangle-square thing, click the rectangle-square thing then drag it on a little bit of the forehead to make a pacth, then release. After that, click ctrl+c then ctrl+v. now that small patch is in the corner, then drag the small patch onto a bit of the eye, ad you see in the picture below, only cover just untill under the eyelashes. Then do ctrl+v again and repeat until the eye is covered just like the picture below. then... TA-DA!! xD

thank you super-sharpay  for letting me use your picture!

Wacky Wednesday Items

As usual, we have the Wacky Wednesday items for this week:


Archibold Hair, Novak Upsweep, Julyana Wedges


Novy Bun, Julyana Side Ponytail,Julyana Peter Pan Tank


Julyana Eyelet Shorts, Aweighsome shades, Aweighsome Zippered V-neck


Aweighsome Anchor Shorts, Aweighsome Slippers, Floral Goddess Curls


What are your thoughts on these items? Let us know in the comments below!

See you around Woozworld!
Sorry about the lack of a sign off pic, it's coming - I promise

05 April 2016

Things that go well with each item of the "magnolia" outfit

The "magnolia" outfit, was on popular a few weeks ago, yet, its still in shopZ. Heres some other things that i think would go gr8 with the magnolia outfit!:

outfit number one featuring magnolia bun: magnolia bun,sequined crop top, wns shorts and spring break sandals!


outfit number two featuring magnolia dress: VIP Jeanette, magnolia dress, wns shorts (again),summer rings


outfit number 3 featuring magnolia skirt, THIS hair, DOESN'T top, magnolia skirt, EXIST heels (im
not weird)

and last of all, outfit number 4, featuring magnolia flats: they go with everything! (actually depends on what color you colored them)


byee! xx anne

New trial blogger

hey! I've literally already have posted two posts, but haven't introduced my self yet x.x xD! I'm kitty, but call me Anne c: lots of ppl have been posting about "fashion" . But I wanted to do something different, I'll be posting helpful things like: things that go well with (ill also be posting some things about fashion).... How to.... And other things that are helpful! I really like smoothies btw c; unicorns and cupcakes are awesome! Byeeeeeeeee!            -Anne, stay fabulous!
    
Me when I WASNT faceless :) I dun really have good pics of me rn x.x

3 ways to earn beex!

                                                                     3 ways to earn beex

1: make sales, if theres anything that you dont want/need/wear anymore, there might be woozens willing to pay for them! if ur selling something in a shop podz, be sure to promote to mp for better sales!

2: activity center, if you're busy, and need beex, the activity center is just the right thing for you! just start an activity, and then do whatever your busy with! (note: you can only have one activity going, wait for that activity to finish then start a new one)

3: quests, if you're the opposite of what i said about the activity center, (bored and need beex) complete some quests! they could give you 25-500 beex just for doing something simple!


remember, there are WAY more possibiliteis to earn beex, but here are just 3! bye for now!

03 April 2016

ZeenaWooz back in Woozworld?

Hey woozens, June here! Sorry I couldn't post, it's just that all the subjects I wanted to post about got taken so fast! 

Anyways, a few days ago, when you logged in on Woozworld, it would say that ZeenaWooz has been spotted around Woozworld. Now, this appeared:


01 April 2016

NEW! Flashback Friday - #1

Hey guys!
I will now be starting up a new section called flashback Friday. I will post each Friday with an old woozworld picture. Here is our first one:

Woozen Quests

Now:


Then:

Camp Harmony: Orientation/Opening 2k16

Hey guys it's kpkeila!
Just letting you know that Camp Harmony will be open TODAY at 6 PM wooz time!
Bring as many friends as you can and don't forget to have fun!