
Heyo. Today i'll be teaching you lovely readers how to do a double exposure photo. What a double exposure is, is two photos overlapped to make one. Much like a double contrast, but slightly different. Here's an example:

Looks SUPER ADVANCED right? Wrong. It's a fairly simple concept that will be simple to explain, with a basic understanding of layers. Here's what you'll need for this lovely project:


I'll explain this to you in simple terms the best i can.
1. Outline your woozen.
Okay, The first thing you EVER do in an edit is OUTLINE YOUR WOOZEN. Of course, never use the Magic Wand tool, the Quick Selection tool, or the "auto-outline" feature. I have a deep-rooted hatred for these. Since its a robot outlining your woozen, you don't get the desired effect. Instead, Use the magnetic lasso, lasso, or polygonal lasso. A lot of editors on here would tell you otherwise, but trust me it's worth it. After you have your woozen outlined you should see a black and white border around them. This border is called marching ants.
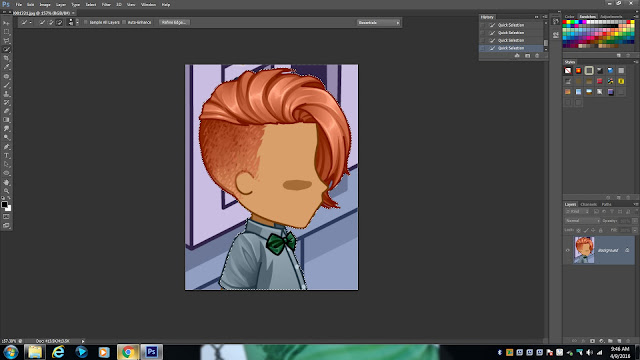
2. Make a new layer with the woozen in it.
To do this, right click your woozen (Or ctrl+click for Mac users) and select "Layer via cut" This creates a new layer with ONLY your woozen in it, which makes the entire process much easier.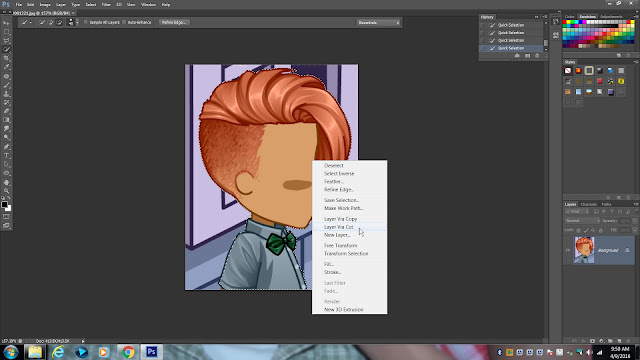
This is what your layers panel should look like:
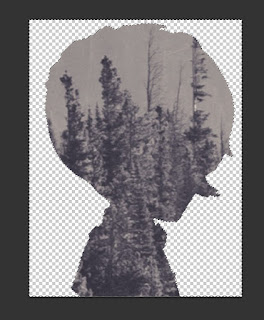
This is what your image should look like now:

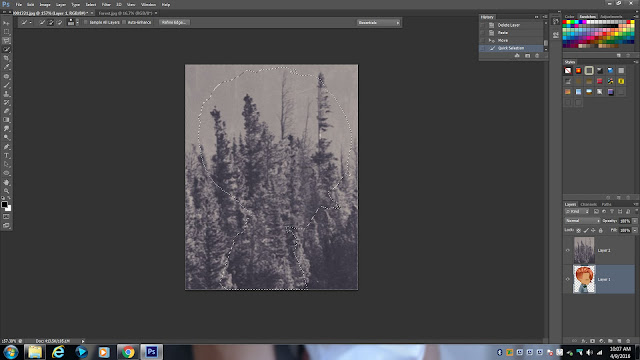
3. Take out the picture you want to overlay on your woozen.

4. Copy and paste the overlay image (forest) onto the image of your woozen.
You can do this by using the Quick Selection tool on the overlay image. Then on your keyboard press ctrl+c (command+c for mac) Now switch to your woozens picture and press ctrl+v (command+v for mac)
Click on the layer labelled "Layer One"
5. Select your woozen.
This will be much easier because your woozen has a transparent background. Just "color in" your woozen with the quick selection tool.
6. Right click (ctrl click for mac) and click "select inverse" (DON'T FORGET TO SWITCH TO LAYER 2 AFTER YOU'VE PRESSED SELECT INVERSE)

Run your eraser in the outlined space.
Select the forest layer:


2. Make a new layer with the woozen in it.
To do this, right click your woozen (Or ctrl+click for Mac users) and select "Layer via cut" This creates a new layer with ONLY your woozen in it, which makes the entire process much easier.

This is what your layers panel should look like:
 |
| Select the layer "Background" and delete it. |
This is what your image should look like now:

3. Take out the picture you want to overlay on your woozen.

4. Copy and paste the overlay image (forest) onto the image of your woozen.
You can do this by using the Quick Selection tool on the overlay image. Then on your keyboard press ctrl+c (command+c for mac) Now switch to your woozens picture and press ctrl+v (command+v for mac)
 |
| this is what your image should look like. |
5. Select your woozen.
This will be much easier because your woozen has a transparent background. Just "color in" your woozen with the quick selection tool.

6. Right click (ctrl click for mac) and click "select inverse" (DON'T FORGET TO SWITCH TO LAYER 2 AFTER YOU'VE PRESSED SELECT INVERSE)


Select the forest layer:

 |
| REDUCE THE OPACITY TO 55% Until next time, Stay creative.  ~James ~James |


No comments:
Post a Comment